Showing posts with label quick & easy. Show all posts

April 7, 2015

Twinkies Ice Cream Cake

This quick and easy recipe is for the Twinkies lovers out there!

My roommate Kyle is a huge fan of Twinkies, so I thought making a Twinkies cake would be perfect for today -- his birthday!

I'm not crazy about baking, and the simplicity of this recipe gives me life.  I combined Twinkies, Edy's Caramel Delight Ice Cream, and Cool Whip and it turned out great!  I'll have to try it with Blue Bunny Birthday Cake Ice Cream next time though...


INGREDIENTS:
5 Twinkies
1 half gallon of ice cream (Edy's Caramel Delight)
1 container of whip topping (Cool Whip)
(Optional) sprinkles, extra caramel, chocolate shavings...etc.


DIRECTIONS:
1.) Line a loaf pan with parchment paper

2.) Place Twinkies on the bottom of the pan


3.) Layer Twinkies with softened (should not be runny) ice cream
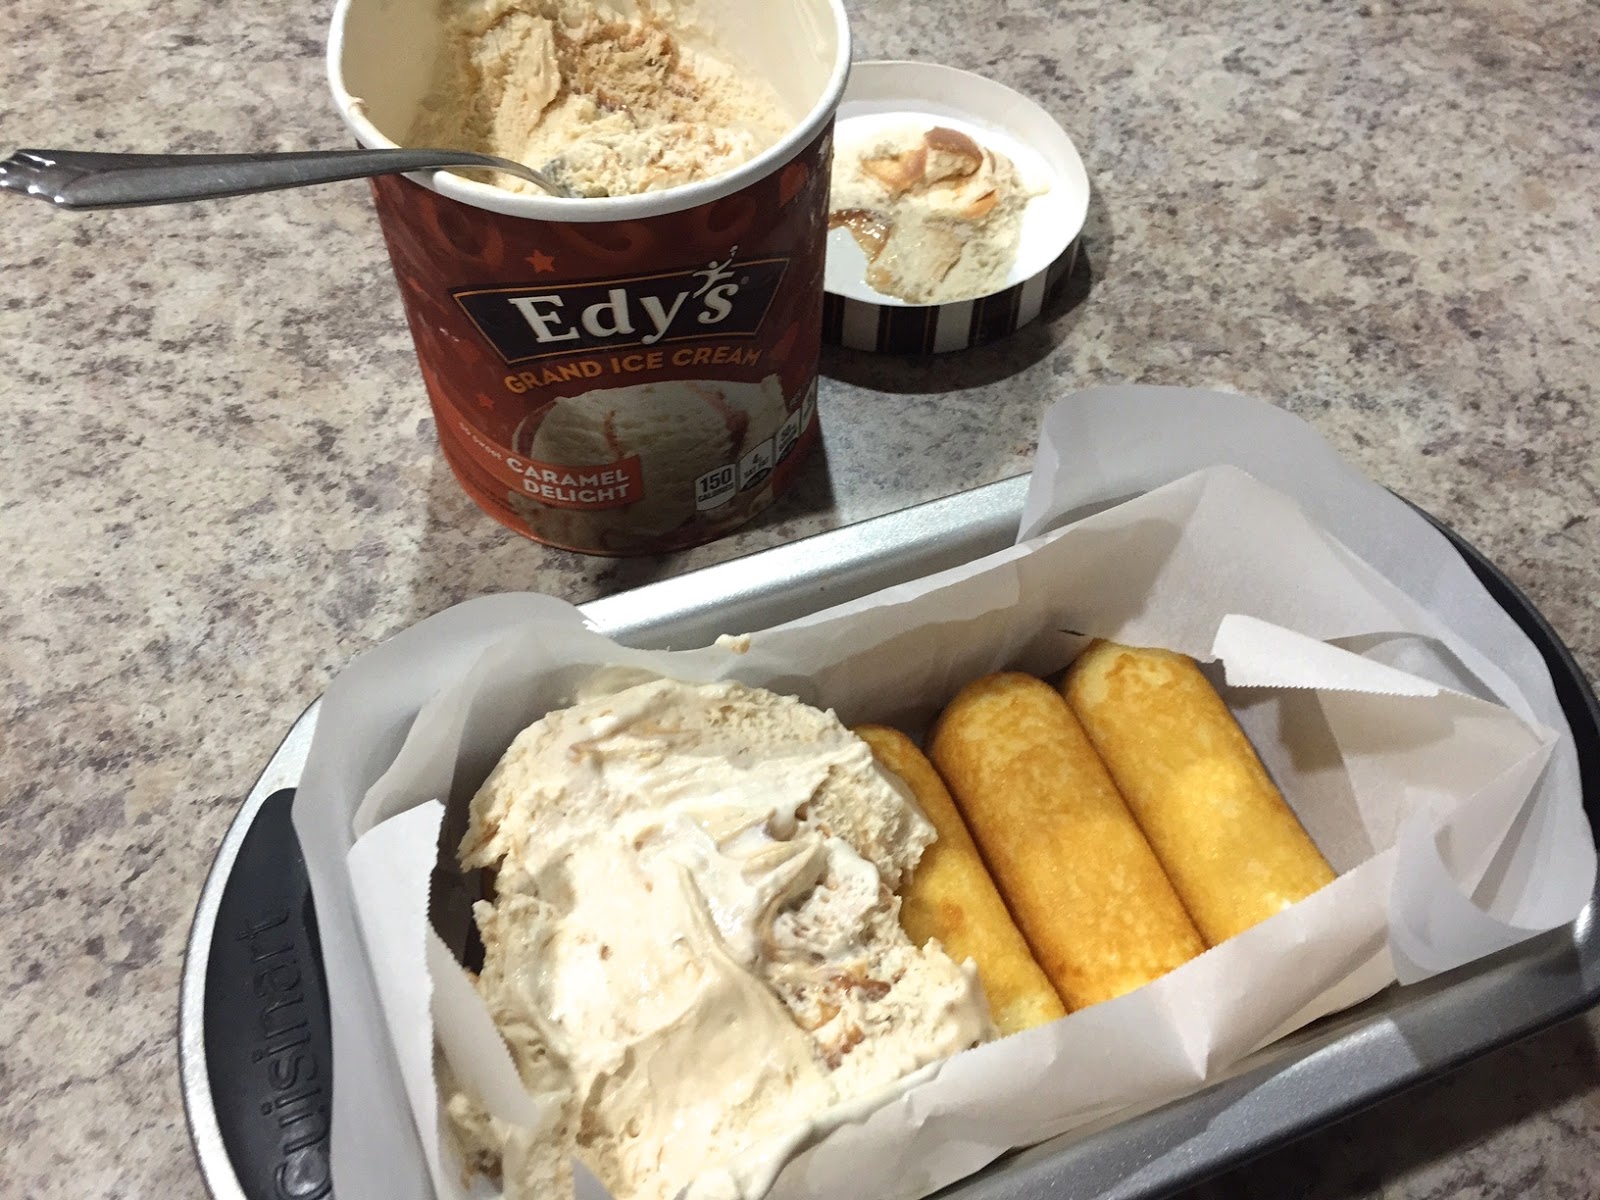
4.) Layer Cool Whip


5.) Cover and seal with saran wrap and aluminum foil.  Freeze overnight.

6.) Lift the cake out by the parchment paper, slice across the Twinkies to expose the cream-filled centers, and enjoy!


It's not the prettiest looking cake, but it was delicious!  I'm sure I can make it look better next time.  If you try this, please share your photos with me (@nowandjenn on Twitter & Instagram)


mànmàn chī,


........................................
Let's chat on Twitter: 

'Like' my FB page: 

See what I'm Pinning: 

Follow me on Instagram: 
@cutiepiecook (my recipe collection) 
@ohmylish (food & restaurant reviews)
@nowandjenn (beauty, fashion, lifestyle)

February 19, 2015

savory oatmeal w/ spinach & poached egg

When people think of oatmeal, they picture the classic Quaker oats and its sweet variety of flavors.  I'm pretty sure I've tried all of those yummy flavors while growing up, but as an adult, I've realized that they're way too sugary.

My mom eats her oatmeal with salt instead of sugar and that is something that I've adopted as well.  One of my favorite combinations for savory oatmeal is with some spinach and a poached egg.  It's super nourishing for breakfast and it keeps me full till lunch with no cravings in sight.


INGREDIENTS:
1/2 Tbsp. vinegar
1 large egg

1/2 cup old-fashion oats (or steel cut oats)
2/3 cup water (or chicken broth for more flavor)
pinch - 1/2 tsp salt (salt to taste)

1/4 cup frozen spinach (or fresh - steamed)
pinch of salt
pinch of black pepper

(optional) 1 tsp. extra virgin olive oil
(optional) parmesan cheese


DIRECTIONS:
1.) Add two inches of water w/ vinegar to a saucepan and bring to a light simmer on low to medium heat.  The vinegar helps the egg white coagulate. It does change the flavor a bit, but I don't mind it.  I think it complements the extra virgin olive oil.


2.) When you start seeing a tiny bubbles, gently slide egg into the water.  Cook for about 4-5 minutes.
Make sure the egg is completely covered and submerged in the water.  If not, gently add some hot tap water to the saucepan.


3.) While you're waiting for the egg to poach, prepare your oats and spinach.  Combine oats and water and a pinch of salt in a deep bowl.  Microwave for 2 minutes.  Yes a deeper bowl is required for the oats to expand without spilling over.  If you're using steel cut oats, you will need to increase the water and cook time.  Also, if you're using chicken broth instead of water, you can leave out the pinch of salt.


4.) Defrost the spinach in microwave for 1 minute.  If it is still cold to the touch, microwave for 10-15 seconds. Sprinkle with a pinch of salt and pinch of pepper.


5.) The egg should be poached by now and can be removed from the saucepan with a slotted spoon.  Assemble all the ingredients to your liking and drizzle with extra virgin olive oil.  A sprinkling of parmesan doesn't hurt either.  I removed the feathery, uncoagulated parts of the egg for more appealing blog photos.  I don't do that in real life.


mànmàn chī,

....................................
let's chat on twitter:

'like' my facebook page:

see what i'm pinning:

follow me on instagram:
@cutiepiecook (my recipe collection)
@ohmylish (food & restaurant reviews)
@nowandjenn (beauty, fashion, lifestyle)


August 26, 2013

classic margherita pizza

With tomato season coming to an end, I'm finding any and every excuse to incorporate this fruitable (fruit commonly mistaken for a vegetable) into all my meals.  One of my favorite quick and easy meals to make is the classic Margherita pizza.  I just love how simple and distinct the flavor profile is for this pizza.  The divine combination of tomato, basil, and garlic work wonderfully in unison to complement each other.


Though I wish I could make this totally from scratch, I just don't have time for all that during a hectic school week.  My schedule usually leaves me feeling crunched for time which always has me searching for short cuts in my cooking.

My shortcut in this case was to use store bought, ready-made thin crust cheese pizza.  It provides a blank canvas for a multitude of different ingredients.  My favorites being tomato, sweet italian basil, and garlic.

Today, I used fresh vine tomatoes from the farmer's market and home-grown sweet italian basil.  The garlic was store bought.  First, I roughly minced the garlic and sprinkled that on the cheese pizza.  Next, I sliced the tomatoes to my preferred thickness (about 1/8 to 1/4 of an inch) and distributed them evenly across the pizza.  I also sprinkled the pizza with some italian seasoning here.

(pre-oven) Margherita pizza in the works...

[[TIP]] You must sandwich the garlic between the cheese and the tomatoes for two reasons: 1) The garlic oils being released during mincing and heating in the oven are purposely trapped in between to allow maximum seepage into the cheese, pizza sauce, and tomatoes. 2) It keeps the garlic from burning in the oven.  Also, if you're not a big fan of large slices of tomato, you can dice the tomatoes instead.

My thriving basil plants!

The rest of the steps are as follows:  Bake the pizza for the recommended time or close to your desired doneness.  Turn off the oven and take the pizza out.  Rough chop some sweet italian basil and sprinkle it on top of the pizza.  Drizzle a bit of extra virgin olive oil on the pizza as well.  I usually throw the pizza back in the warm oven for another minute or two to warm up the basil and extra virgin olive oil.  And voila, dinner is served in a matter of 15-20 minutes!  Yum!!

What are your favorite pizzas and pizza recipes?!  Sound off in the comments below!  I would love to try a new recipe :)


mànmàn chī,


....................................
let's chat on twitter:

'like' my facebook page:

see what i'm pinning:

follow me on instagram:
@cutiepiecook (my recipe collection)
@ohmylish (food & restaurant reviews)
@nowandjenn (beauty, fashion, lifestyle)
Related Posts Plugin for WordPress, Blogger...